Cherry Chia Pudding Recipe
Introduction
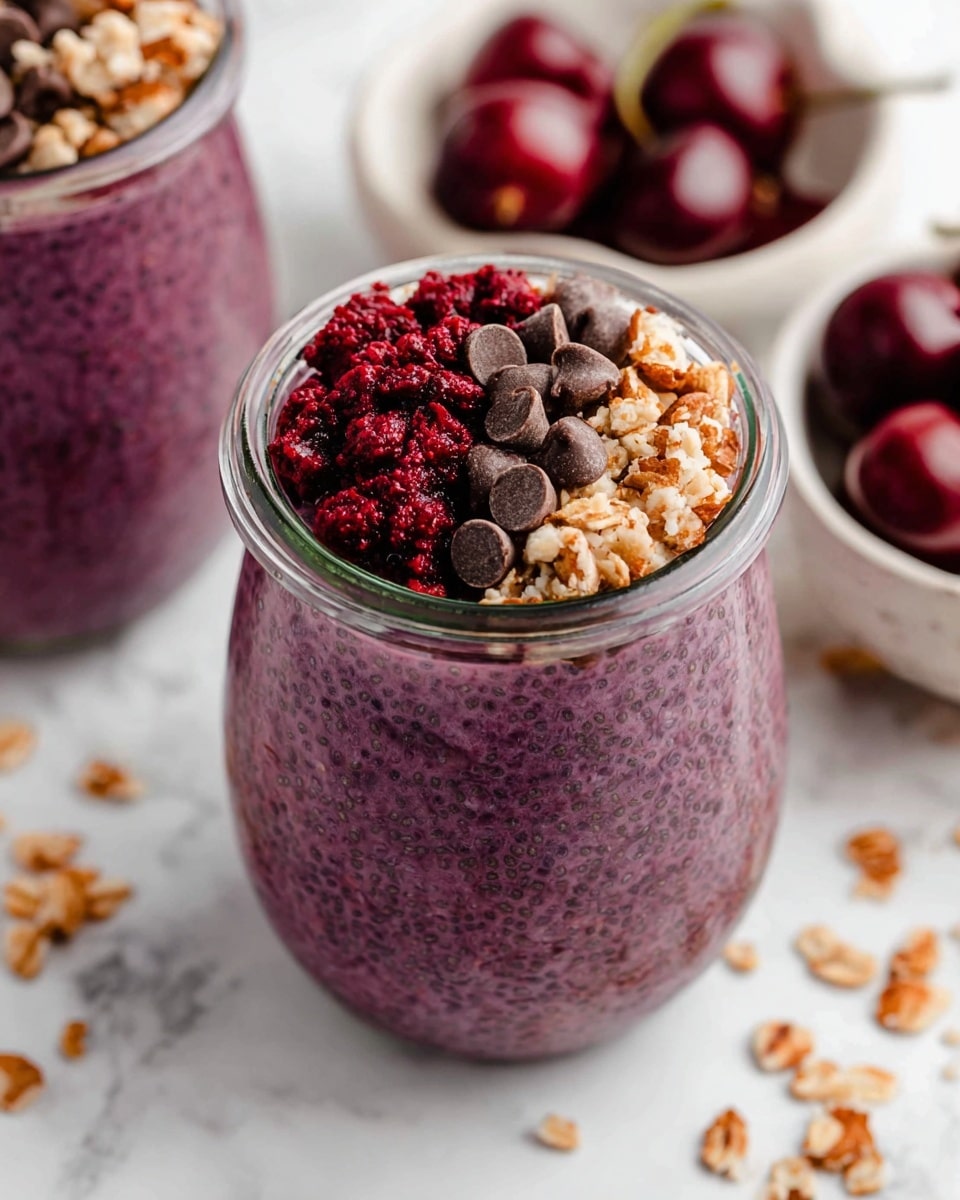
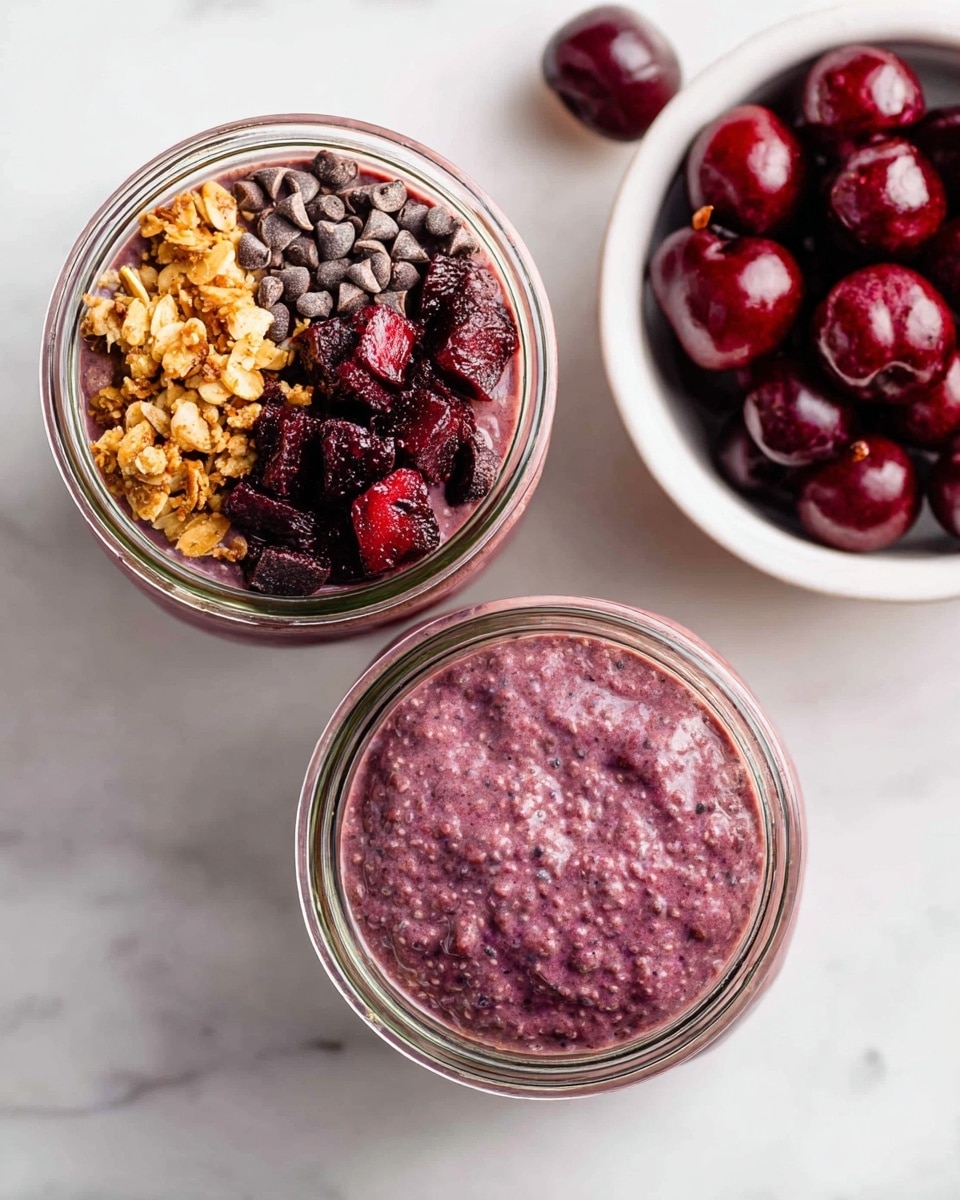
Cherry chia pudding is a refreshing and nutritious breakfast or snack that’s easy to prepare. Combining sweet frozen cherries with creamy dairy-free milk and nutrient-rich chia seeds creates a naturally vibrant and satisfying dish.
Ingredients
- ½ cup (70 g) frozen cherries
- ½ cup (125 ml) dairy-free milk
- 2 teaspoons maple syrup, or to taste
- ⅛ teaspoon almond extract, or to taste
- 3 tablespoons (30 g) whole chia seeds
Instructions
- Step 1: Add the frozen cherries, dairy-free milk, maple syrup, and almond extract to a blender. Blend until smooth. A small personal blender works best for single-serving portions.
- Step 2: Pour the blended cherry milk into a jar or container, then stir in the whole chia seeds thoroughly.
- Step 3: Let the mixture sit for about 10 minutes, then stir again to break up any clumps that may have formed.
- Step 4: Cover and refrigerate overnight. This allows the chia seeds to fully absorb the liquid and thicken the pudding.
- Step 5: Before serving, stir the pudding again. If you find it not sweet enough, add more maple syrup and top with your favorite toppings.
Tips & Variations
- Use whole chia seeds for the best texture; ground seeds may result in a different consistency.
- Adjust the almond extract carefully—too much can overpower the delicate cherry flavor.
- If your pudding isn’t thick enough, try reducing the milk to ⅓ cup for a creamier result.
- No need to thaw frozen cherries before blending—they work perfectly straight from the freezer.
Storage
Store cherry chia pudding in an airtight container in the refrigerator for up to 3 days. Stir before serving, and feel free to add fresh toppings each time. This pudding is best enjoyed cold and does not require reheating.
How to Serve
Serve this delicious recipe with your favorite sides.
FAQs
Can I use fresh cherries instead of frozen?
Yes, fresh cherries can be used, but the pudding may be less chilled and slightly less thick initially. You might want to add a few ice cubes to the blender to maintain a cold temperature.
What if I don’t have almond extract?
You can omit the almond extract or substitute with a small amount of vanilla extract. The flavor will be different but still delicious.
PrintCherry Chia Pudding Recipe
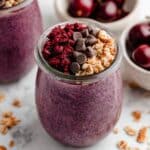
This Cherry Chia Pudding is a simple, nutritious breakfast or snack option featuring blended frozen cherries, dairy-free milk, maple syrup, almond extract, and whole chia seeds. The chia seeds soak overnight to create a creamy, satisfying pudding packed with fiber and antioxidants, perfect for a quick and healthy start to your day.
- Prep Time: 15 minutes
- Cook Time: 0 minutes
- Total Time: 8 hours 15 minutes
- Yield: 1 serving 1x
- Category: Breakfast
- Method: Blending
- Cuisine: American
- Diet: Vegan
Ingredients
Ingredients
- ½ cup (70 g) frozen cherries
- ½ cup (125 ml) dairy-free milk
- 2 teaspoons maple syrup, or to taste
- ⅛ teaspoon almond extract, or to taste
- 3 tablespoons (30 g) whole chia seeds
Instructions
- Blend Ingredients: To a blender, add the frozen cherries, dairy-free milk, maple syrup, and almond extract. Blend until smooth. A small personal blender works best for making a single serving.
- Add Chia Seeds: Pour the cherry milk mixture into a jar or container, then stir in the whole chia seeds thoroughly.
- Initial Soak: Let the chia pudding sit for about 10 minutes, then stir again to break up any clumps of seeds that might have formed.
- Refrigerate Overnight: Cover the pudding and refrigerate overnight. This resting time allows the chia seeds to absorb liquid and thicken into a pudding texture. Depending on the chia seed brand, some may thicken sooner.
- Final Stir and Serve: Before enjoying, stir the pudding once more. Adjust sweetness by adding more maple syrup if needed, then add your favorite toppings if desired.
Notes
- No need to thaw the frozen cherries before blending.
- A small personal blender, such as a Nutribullet, is ideal for single servings.
- Frozen cherry quality affects color; some brands yield more vibrant cherry red while others turn grayish.
- Adding lemon juice slightly preserves color but can overpower the almond extract flavor.
- Use sweet frozen cherries as sour cherries may alter the final taste and texture, which has not been tested.
- Always use whole chia seeds, not ground.
- Measure almond extract carefully as too much can overpower the pudding.
- 70 grams of frozen cherries corresponds to a heaping ½ cup measurement.
- Chia seed brands vary in thickening power; you may need to adjust milk quantity (reduce to ⅓ cup) for preferred pudding thickness.
Keywords: cherry chia pudding, vegan breakfast, dairy-free pudding, healthy breakfast, chia seed recipe, maple syrup dessert, almond extract pudding