Addicting Mini Sugar Cookies Recipe
Introduction
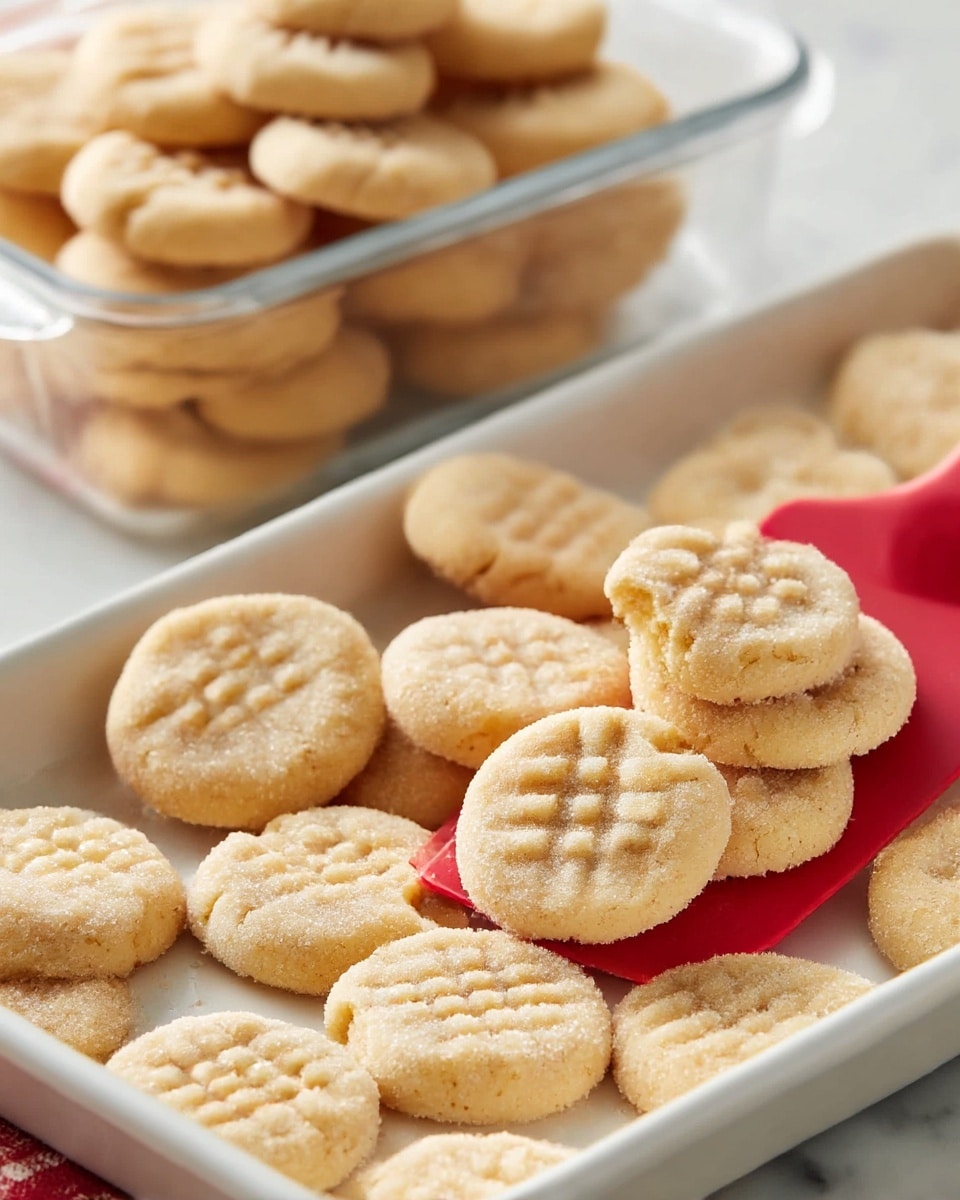
These addicting mini sugar cookies are soft, buttery, and coated in a sweet, sparkling sugar crust. Perfectly bite-sized, they make a delightful treat for any occasion or just a simple snack to satisfy your sweet tooth.

Ingredients
- ½ cup (113g) unsalted butter, softened but still cool to the touch
- ½ cup (115g) granulated sugar
- ½ cup (60g) powdered sugar
- ½ cup (108g) canola or vegetable oil
- 1¼ teaspoons pure vanilla extract
- ¼ teaspoon almond extract
- 1 large egg
- 2⅓ cups (291g) all purpose flour, spooned and leveled
- ¾ teaspoon baking soda
- ¾ teaspoon cream of tartar
- ½ teaspoon salt
- ¾ cup (173g) granulated sugar, divided, for rolling and sprinkling
Instructions
- Step 1: Preheat oven to 350°F. Line three baking sheets with parchment paper.
- Step 2: In a large bowl, use an electric mixer to beat butter, granulated sugar, and powdered sugar until combined. Add oil and beat again, scraping the bowl as needed.
- Step 3: Add the egg, vanilla extract, and almond extract. The mixture may look curdled; this is normal.
- Step 4: In a separate bowl, whisk together flour, baking soda, cream of tartar, and salt. Add this to the wet ingredients and beat until combined, scraping the bowl as needed.
- Step 5: Set aside ¼ cup of sugar for topping. Place ½ cup sugar in a container wide enough to toss dough balls for coating.
- Step 6: Scoop 2-teaspoon portions of dough and drop them in the sugar container. Gently shake or use fingers to coat dough balls evenly.
- Step 7: Place coated dough balls a couple inches apart on prepared baking sheets. Flatten each ball using a cookie stamp or the bottom of a glass.
- Step 8: Bake for 9-12 minutes, until cookies have puffed and edges begin to set. Immediately sprinkle with reserved sugar once out of the oven.
- Step 9: Transfer baking sheets to wire racks and cool cookies completely before storing.
Tips & Variations
- If you don’t have a cookie scoop, use two small spoons to portion dough. For flattening, the bottom of a drinking glass works well if you lack a cookie stamp.
- The dough is soft due to the butter and oil combination; rolling in sugar helps prevent sticking and adds a nice crunch.
- Make cookies in batches if you have limited baking sheets. Cool trays thoroughly before reusing to prevent spreading.
- Try adding a sprinkle of colored sugar or finely chopped nuts on top before baking for a decorative twist.
Storage
Store cookies in an airtight container at room temperature for up to 3 days. For longer freshness, refrigerate for up to 5 days or freeze up to 2 months. Thaw frozen cookies at room temperature and they retain their texture and flavor beautifully.
How to Serve
Serve this delicious recipe with your favorite sides.
FAQs
Can I use other types of oil instead of canola or vegetable oil?
Yes, mild-flavored oils like light olive oil or grapeseed oil can work, but avoid strong-flavored oils to keep the cookie taste balanced.
Why is the dough curdled after adding the egg and extracts?
A slightly curdled appearance is normal because of the cold butter mixed with lighter ingredients. It won’t affect the final texture, so continue mixing as directed.
PrintAddicting Mini Sugar Cookies Recipe

These addicting mini sugar cookies feature a soft and tender texture thanks to a unique combination of butter and oil in the dough. Rolled in sugar and cleverly stamped or flattened before baking, these bite-sized treats are perfect for cookie swaps, parties, or anytime you crave a classic sweet bite.
- Prep Time: 15 minutes
- Cook Time: 10 minutes
- Total Time: 25 minutes
- Yield: About 90–100 mini sugar cookies 1x
- Category: Dessert
- Method: Baking
- Cuisine: American
Ingredients
Wet Ingredients
- ½ cup (113g) unsalted butter, softened but still cool to the touch
- ½ cup (108g) canola or vegetable oil
- 1 large egg
- 1¼ teaspoons pure vanilla extract
- ¼ teaspoon almond extract
Dry Ingredients
- 2⅓ cups (291g) all purpose flour, spooned and leveled
- ¾ teaspoon baking soda
- ¾ teaspoon cream of tartar
- ½ teaspoon salt
Sugar
- ½ cup (115g) granulated sugar
- ½ cup (60g) powdered sugar
- ¾ cup (173g) granulated sugar, divided (for rolling and sprinkling)
Instructions
- Prepare Baking Sheets: Preheat the oven to 350°F (175°C) and line three baking sheets with parchment paper to ensure easy cookie removal and minimal sticking.
- Mix Wet Ingredients: In a large bowl, use an electric mixer to beat together the softened butter, granulated sugar, and powdered sugar until combined. Add the canola or vegetable oil and continue beating, scraping the sides and bottom occasionally. Mix in the egg, vanilla extract, and almond extract. The mixture may look slightly curdled, but this is normal.
- Combine Dry Ingredients: In a separate bowl, whisk together the all-purpose flour, baking soda, cream of tartar, and salt until evenly distributed.
- Form Dough: Gradually add the dry mixture to the wet ingredients and beat until just combined, again scraping the bowl sides and bottom as necessary.
- Prepare Sugar Coating: Reserve ¼ cup of the granulated sugar for topping after baking. Place ½ cup of the granulated sugar into a container suitable for coating the dough balls. This container should be wide and have sides to allow gentle shaking of the dough balls.
- Shape and Coat Dough Balls: Using a 1-teaspoon scoop (heaping to equal 2 teaspoons), scoop dough portions and drop them into the container with sugar. Coat the dough balls by gently shaking the container or using fingers to evenly cover them with sugar.
- Arrange on Baking Sheets: Place the coated dough balls on the prepared baking sheets about two inches apart. Flatten each dough ball with a cookie stamp or the bottom of a drinking glass to create an even shape.
- Bake Cookies: Bake in the preheated oven for 9-12 minutes until the cookies puff and start to set around the edges. They might still be soft in the center but will crisp as they cool.
- Finish with Sugar Topping: Immediately upon removing the baking sheets from the oven, sprinkle the reserved sugar on top of the warm cookies for added sparkle and sweetness.
- Cool and Store: Transfer the cookies to wire racks to cool completely before storing. Store at room temperature for up to 3 days, refrigerate up to 5 days, or freeze for up to 2 months.
Notes
- Equipment: Use a 1-teaspoon cookie scoop for consistent dough portions and a cookie stamp or glass bottom to flatten the cookies for a professional look.
- Dough Handling: The dough is soft due to the butter and oil combination; rolling in sugar helps manage the stickiness and adds texture.
- Baking Strategy: Bake dough in batches if you only have one or two baking sheets. Always cool baking sheets completely between batches to prevent spreading.
- Storage: These cookies keep well at room temperature, in the fridge, or frozen. They maintain texture and flavor beautifully when frozen.
Keywords: mini sugar cookies, bite-sized cookies, soft sugar cookies, classic sugar cookies, cookie recipe, holiday cookies, easy cookies