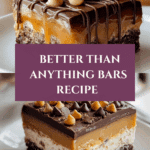
Better Than Anything Bars and Brownies Recipe
Introduction
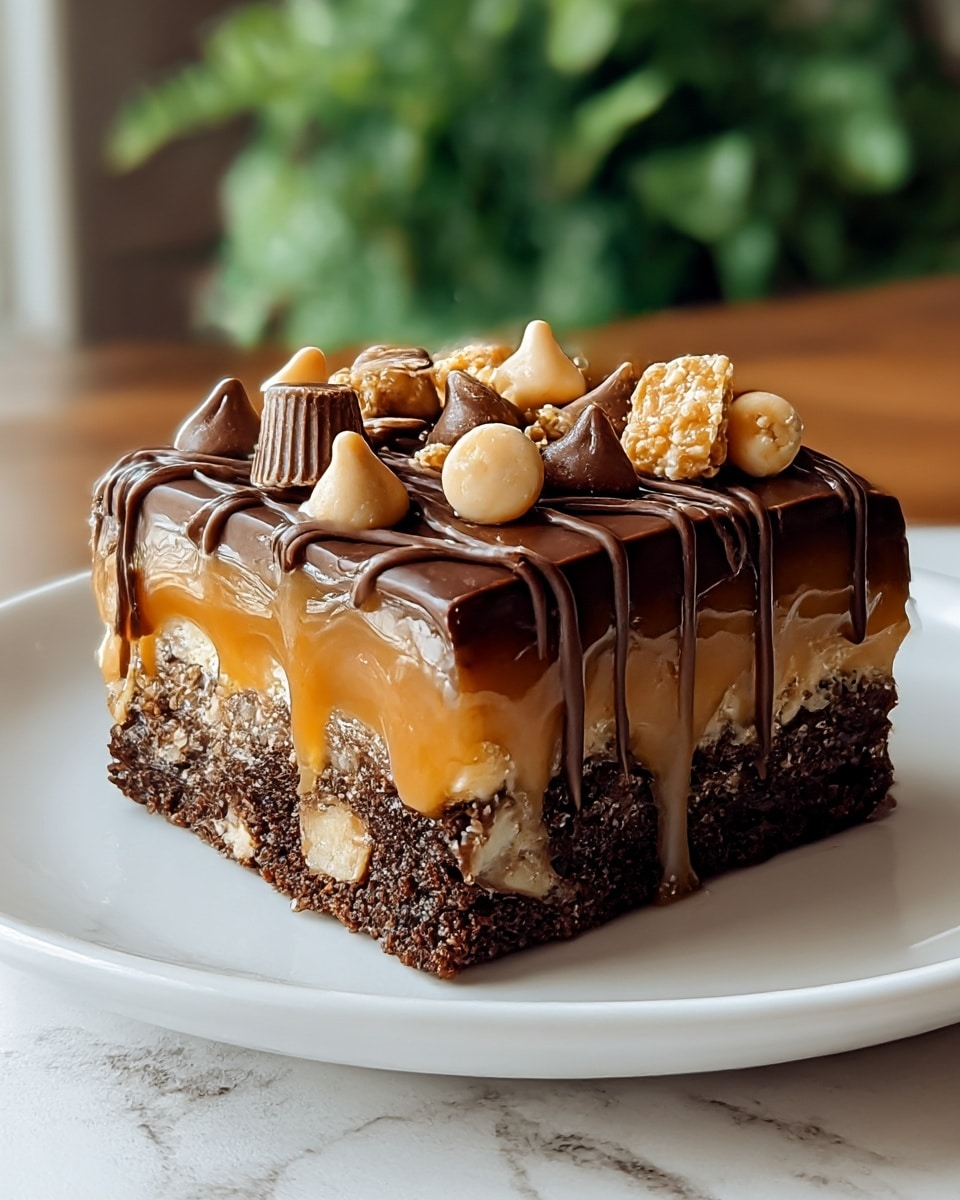
Better Than Anything Bars combine a rich chocolate base with layers of creamy condensed milk, gooey caramel, crunchy toffee, and fluffy whipped topping. This dessert is indulgent, texturally interesting, and perfect for satisfying sweet cravings.
Ingredients
- 1 box (about 15.25 oz) chocolate cake mix
- 1/2 cup (113 g) unsalted butter, melted
- 1 can (14 oz) sweetened condensed milk
- 1 jar (12 oz) caramel sauce or homemade from 14 oz caramels and 5 oz evaporated milk
- 1 cup (about 120 g), crushed toffee bits, divided for layering
- 1 1/2 cups (360 ml) whipped topping or whipped cream
- 1/2 cup (90 g) mini chocolate chips (optional garnish)
- Optional additions: 1 cup (175 g) chocolate chips; nuts or peanut butter to taste
Instructions
- Step 1: Preheat the oven to 350°F (175°C). Grease a 9″x13″ (23×33 cm) baking pan or line it with parchment paper. Measure and prepare all ingredients.
- Step 2: In a mixing bowl, combine the chocolate cake mix with the melted butter until crumbly. Press this mixture evenly into the prepared pan to form the base layer.
- Step 3: Bake the base for 12 to 14 minutes until just set and soft to the touch. Avoid overbaking to keep a moist, brownie-like texture.
- Step 4: While warm, poke 20-25 holes evenly across the cake surface using a wooden spoon handle. Pour the sweetened condensed milk slowly in a zigzag pattern to soak into the holes.
- Step 5: Pour the caramel sauce evenly over the condensed milk layer. If using homemade caramel, melt caramels with evaporated milk before pouring. Sprinkle crushed toffee bits evenly over the caramel, pressing lightly to adhere.
- Step 6: Refrigerate the bars for at least 2 hours or overnight to allow flavors to meld and layers to set.
- Step 7: Before serving, spread whipped topping evenly on the bars and optionally garnish with mini chocolate chips. For clean slices, use a warm knife wiped between cuts, and remove bars from the fridge 10-15 minutes before serving.
Tips & Variations
- Use a high-quality chocolate cake mix and caramel sauce for the best flavor and texture.
- For a vegan version, substitute sweetened condensed milk and whipped topping with coconut-based alternatives.
- To avoid nuts for allergies, omit or replace with seeds like pumpkin or sunflower.
- For gluten-free bars, use a certified gluten-free chocolate cake mix and ensure all mix-ins are gluten-free.
- Add chocolate chips, nuts, or peanut butter for extra flavor and texture.
Storage
Store the bars covered in the refrigerator for up to 4-5 days. For best texture, let them sit at room temperature for 10-15 minutes before serving. Reheat is not recommended as it may affect the layered textures.
How to Serve
Serve this delicious recipe with your favorite sides.
FAQs
Can I make these bars ahead of time?
Yes, these bars actually benefit from being chilled overnight to let the flavors meld and layers set properly.
Can I use homemade caramel sauce?
Absolutely. Homemade caramel made by melting caramels with evaporated milk works beautifully and adds a rich, buttery flavor.
PrintBetter Than Anything Bars and Brownies Recipe
Better Than Anything Bars are a decadent layered dessert featuring a moist chocolate cake base infused with sweetened condensed milk, topped with rich caramel sauce, crunchy toffee bits, and finished with fluffy whipped topping. This indulgent treat combines contrasting textures and flavors, making it perfect for satisfying sweet cravings with a brownie-like texture and buttery caramel goodness.
- Prep Time: 15 minutes
- Cook Time: 14 minutes
- Total Time: 2 hours 30 minutes (including chilling time)
- Yield: 12 to 16 bars 1x
- Category: Dessert
- Method: Baking
- Cuisine: American
Ingredients
Base Layer
- 1 box (about 15.25 oz) chocolate cake mix
- 1/2 cup (113 g) unsalted butter, melted
Layered Toppings
- 1 can (14 oz) sweetened condensed milk
- 1 jar (12 oz) caramel sauce or homemade caramel from 14 oz caramels and 5 oz evaporated milk
- 1 cup (about 120 g) crushed toffee bits, divided
- 1 1/2 cups (360 ml) whipped topping or whipped cream
Optional Garnishes and Additions
- 1/2 cup (90 g) mini chocolate chips (optional garnish)
- 1 cup (175 g) chocolate chips, nuts, or peanut butter (optional additions to customize flavor and texture)
Instructions
- Prepare Your Ingredients and Baking Pan: Preheat your oven to 350°F (175°C). Measure all ingredients accurately. Grease a 9″x13″ (23×33 cm) baking pan or line it with parchment paper for easy removal later.
- Create the Cake Base: In a mixing bowl, combine the chocolate cake mix with the melted unsalted butter until a crumbly mixture forms. Press this mixture evenly into the prepared baking pan to form the base layer.
- Bake the Cake Layer: Bake the base layer for 12 to 14 minutes until it is just set and soft to the touch, ensuring a moist and brownie-like texture. Avoid overbaking.
- Add Layered Toppings: While the cake is still warm, use the handle of a wooden spoon to poke 20-25 evenly spaced holes across the surface. Slowly pour the sweetened condensed milk over the cake in a zigzag pattern so it seeps into the holes. Next, evenly pour caramel sauce over the condensed milk layer. If using homemade caramel, melt the caramels with evaporated milk before pouring. Sprinkle half of the crushed toffee bits evenly over the caramel layer, pressing lightly to help them stick.
- Chill and Finish: Refrigerate the bars for at least 2 hours or preferably overnight to allow the layers to set and flavors to meld. Before serving, spread the whipped topping or whipped cream evenly over the bars. Optionally, garnish with mini chocolate chips and the remaining crushed toffee bits for added texture and appearance. For cleaner slices, warm a knife before cutting and wipe it between each cut. Remove the bars from the refrigerator 10-15 minutes prior to serving to enjoy the optimal texture.
Notes
- Use a high-quality chocolate cake mix and good caramel sauce or homemade caramel for best results.
- To make homemade caramel, slowly melt caramels with evaporated milk until smooth.
- For vegan or dairy-free variants, substitute with coconut-based alternatives and non-dairy whipped toppings.
- For nut allergies, omit nuts or replace with seeds like pumpkin or sunflower seeds.
- Gluten-free options require a certified gluten-free cake mix and toppings.
- For a lower-calorie version, reduce butter and use light or reduced-sugar caramel sauces.
- Allowing the bars to chill overnight enhances flavor and texture.
- Use a warm knife to slice for clean edges and presentation.
Keywords: Better Than Anything Bars, Chocolate Cake Mix Bars, Caramel Bars, Toffee Bars, Layered Dessert, Easy Brownies, Sweetened Condensed Milk Dessert, Caramel Sauce Dessert