Oreo Balls for Valentine’s Day Recipe
Introduction
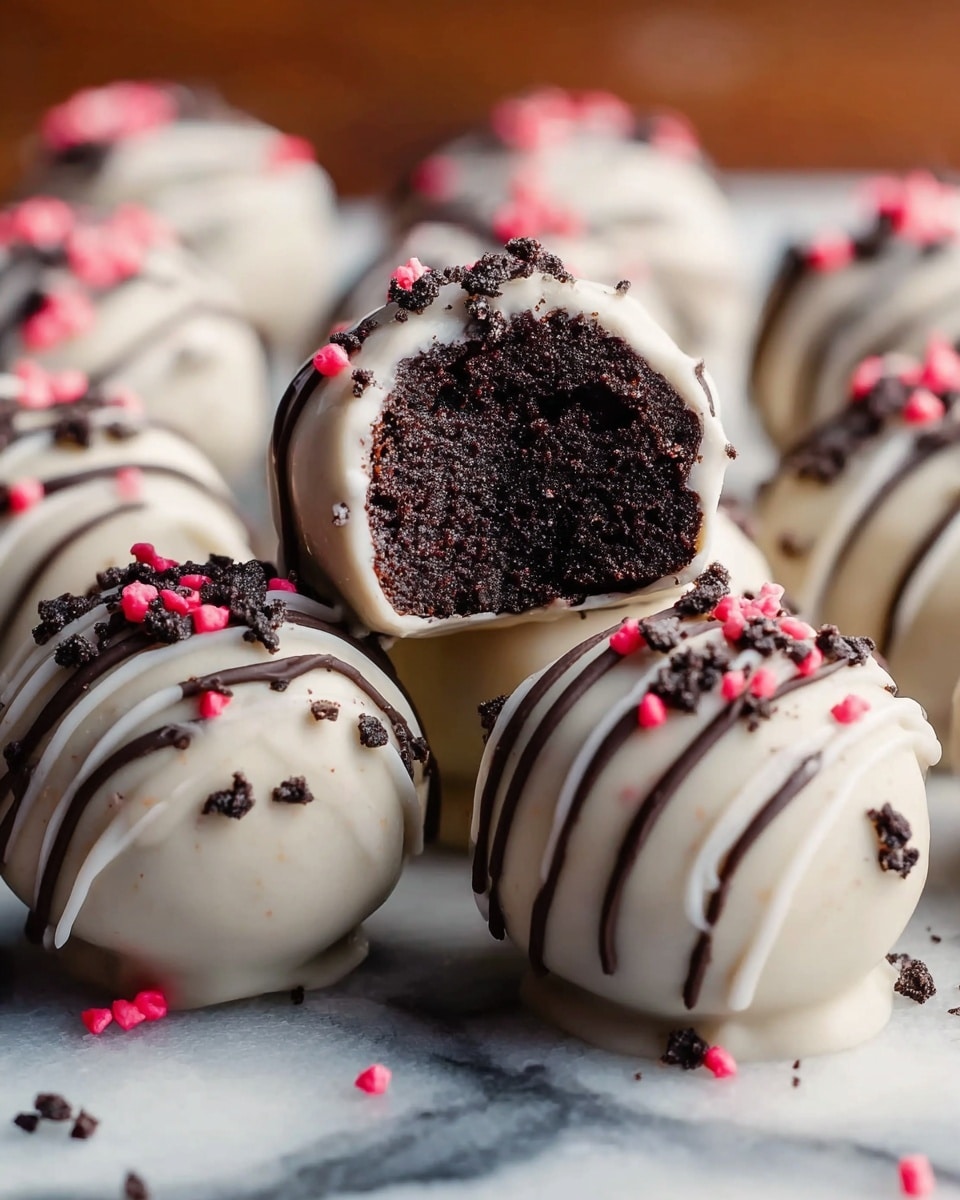
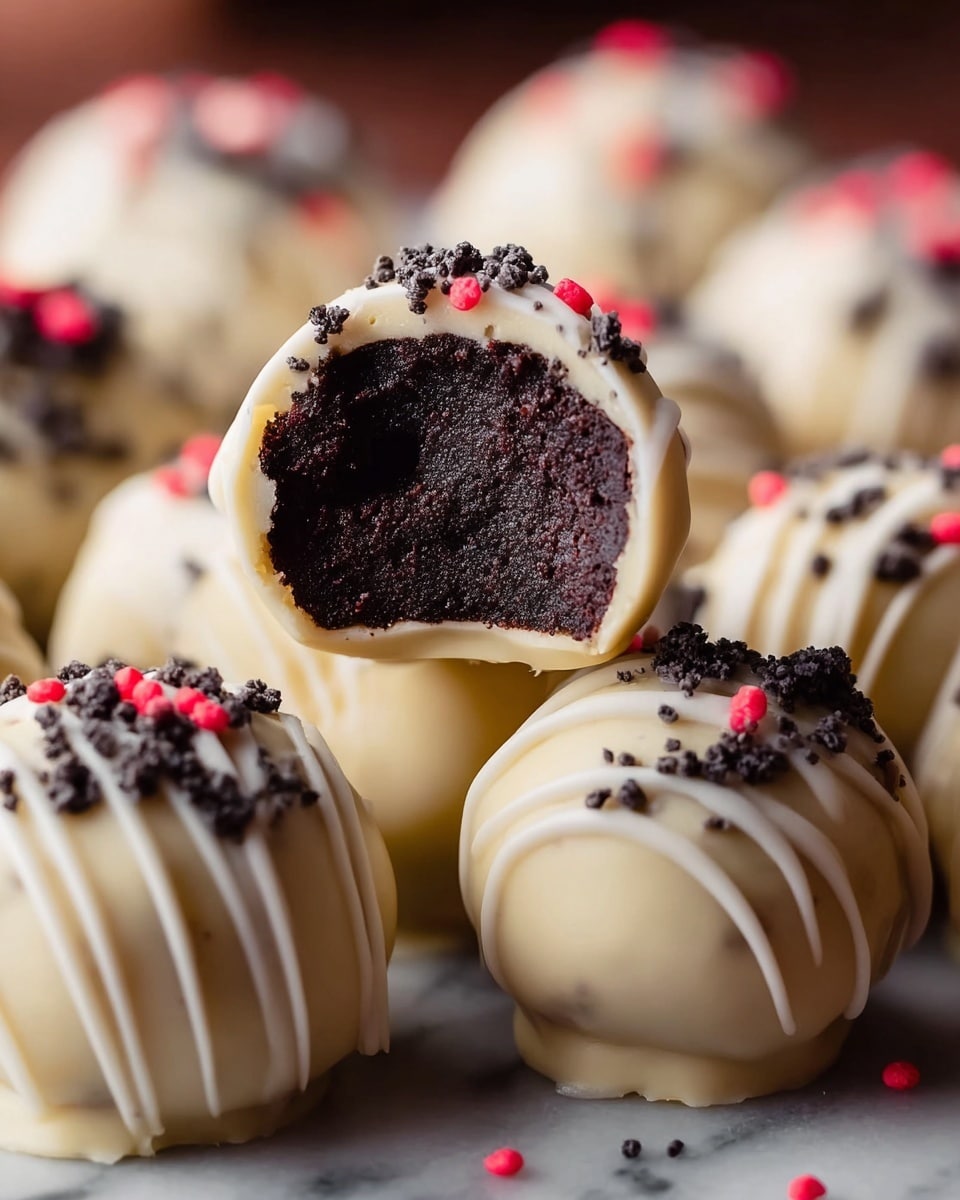
Oreo Balls for Valentine’s Day are a delightful treat that combines rich chocolate with creamy filling. These bite-sized confections are perfect for sharing with loved ones and add a special touch to any celebration.
Ingredients
- 36 Oreos
- 220 grams of cream cheese, softened
- 300 grams of dark chocolate, melted
- 50 grams of white chocolate, melted (optional)
- 2 tablespoons of pink and red sprinkles
Instructions
- Step 1: Crush the cookies thoroughly using a food processor until you achieve fine crumbs.
- Step 2: In a mixing bowl, combine the crushed Oreos with softened cream cheese. Mix until fully incorporated.
- Step 3: Scoop and roll the mixture into small balls, placing them on a wax paper-lined baking sheet.
- Step 4: Refrigerate the Oreo balls for at least 30 minutes to help them firm up before coating.
- Step 5: Gently melt the dark chocolate using a microwave or double boiler, stirring until smooth.
- Step 6: Dip each ball into the melted chocolate, ensuring even coverage, and let excess drip back into the bowl.
- Step 7: Before the chocolate sets, add sprinkles or drizzle with melted white chocolate to enhance visual appeal.
- Step 8: Return the balls to the refrigerator to set, then enjoy once they have hardened.
Tips & Variations
- For a festive look, try using different colored sprinkles or drizzle with colored candy melts instead of white chocolate.
- Make sure the cream cheese is fully softened for easier mixing and smoother texture.
- You can substitute the dark chocolate with milk or white chocolate for a sweeter variation.
Storage
Store the Oreo Balls in an airtight container in the refrigerator for up to one week. They can also be frozen for longer storage. Reheat by allowing them to come to room temperature before serving for the best texture.
How to Serve
Serve this delicious recipe with your favorite sides.
FAQs
Can I make Oreo Balls ahead of time?
Yes, Oreo Balls can be made a day or two in advance and stored in the refrigerator. They often taste even better after the flavors have melded.
What is the best way to crush the Oreos if I don’t have a food processor?
You can place the Oreos in a sealed plastic bag and crush them using a rolling pin or heavy pan until you reach fine crumbs.
PrintOreo Balls for Valentine’s Day Recipe

Delightfully rich and creamy Oreo Balls perfect for Valentine’s Day, combining crushed Oreos with smooth cream cheese and coated in luscious melted dark chocolate. These bite-sized treats are easy to prepare, visually appealing with optional white chocolate drizzle and festive sprinkles, making them ideal for sharing with loved ones during the celebration.
- Prep Time: 30 minutes
- Cook Time: 15 minutes
- Total Time: 45 minutes
- Yield: 36 Oreo Balls 1x
- Category: Dessert
- Method: No-Cook
- Cuisine: American
- Diet: Vegetarian
Ingredients
Base
- 36 Oreos
- 220 grams of cream cheese, softened
Coating
- 300 grams of dark chocolate, melted
- 50 grams of white chocolate, melted (optional)
- 2 tablespoons of pink and red sprinkles
Instructions
- Crush Oreos: Thoroughly crush the Oreos using a food processor until you achieve fine crumbs. This will create the base texture for your Oreo Balls.
- Mix with Cream Cheese: In a mixing bowl, combine the crushed Oreo crumbs with softened cream cheese. Mix until the mixture is fully incorporated and smooth.
- Form Balls: Scoop out the mixture and roll into small, bite-sized balls. Place each ball on a baking sheet lined with wax paper to prevent sticking.
- Chill: Refrigerate the Oreo balls for at least 30 minutes to allow them to firm up before coating with chocolate.
- Melt Dark Chocolate: Gently melt the dark chocolate using a microwave or double boiler, stirring continuously until smooth and glossy.
- Coat Balls: Dip each chilled Oreo ball into the melted dark chocolate, ensuring it is evenly coated. Allow any excess chocolate to drip back into the bowl for a neat finish.
- Decorate: Before the chocolate sets, decorate the balls by adding pink and red sprinkles or drizzle with melted white chocolate for added visual appeal.
- Set: Return the coated balls to the refrigerator until the chocolate hardens completely. Once set, your Oreo Balls are ready to enjoy!
Notes
- These Oreo Balls offer a perfect mix of rich chocolate and creamy filling, ideal for Valentine’s Day gifts or party treats.
- Ensure the cream cheese is softened for smooth mixing and better texture.
- Chilling the balls before coating helps maintain their shape and makes dipping easier.
- You can substitute dark chocolate with milk chocolate if preferred.
- Use wax paper to prevent the balls from sticking to surfaces during chilling.
Keywords: Oreo Balls, Valentine’s Day dessert, chocolate treats, no-bake Oreo recipe, creamy Oreo balls, easy Valentine’s Day snacks